
Introduction
Embarking on the journey of making homemade ice cream can be as delightful as savoring the final product, especially when you discover the simplicity of creating this frozen treat with a blender.
Gone are the days when ice cream making was left to the confines of specialized machines and lengthy processes. With the right ingredients and a trusty blender, you can whip up a batch of creamy, dreamy ice cream that rivals the nostalgic flavors of childhood scoops.
Whether you’re a culinary expert or a kitchen beginner, the transformation of basic ingredients into a sublime dessert is a rewarding experience that brings a touch of magic to your palate.
Utilizing a blender for ice cream making not only simplifies the process but also opens up a world of customization. From the classic vanilla to more adventurous flavor combinations, the possibilities are endless and tailored to your taste.
This guide will walk you through the essential ingredients and step-by-step instructions to ensure your blender ice cream is perfect every time.
So, let’s dive into the sweet world of homemade ice cream, where the blend of convenience and creativity yields a dessert that’s sure to impress.
Ingredients for homemade ice cream
Heavy cream
The cornerstone of our homemade ice cream is none other than heavy cream, a rich and versatile dairy product that is essential for achieving the luxurious texture we all crave in ice cream.
Unlike its lighter counterparts, heavy cream has the high fat content necessary to whip into stiff peaks, a crucial step that introduces air and volume into our dessert, resulting in that classic creamy consistency.
It’s important to use chilled heavy cream, as this ensures the mixture will reach the desired firmness when whipped.
Remember, the quality of the heavy cream can greatly influence the final taste and texture of your ice cream, so opting for a high-quality brand can make all the difference in your homemade creation.
When preparing to make ice cream with a blender, the heavy cream should be as cold as possible. This not only aids in the whipping process but also helps maintain the cold chain that is vital for the perfect set once the ice cream is placed in the freezer.
By starting with a well-chilled base, you’re setting yourself up for success, ensuring that your ice cream will have the smooth, melt-in-your-mouth quality that makes it so irresistible.
So, before you begin, make sure your heavy cream is thoroughly chilled to maximize the volume and stability of your whipped cream, paving the way for an indulgent and satisfying homemade ice cream experience.
Sweetened condensed milk
Following the heavy cream, sweetened condensed milk is the next key ingredient in our homemade ice cream recipe. This thick, sweet syrup is preferred over granulated or powdered sugars for a couple of compelling reasons.
Firstly, it integrates seamlessly into the mixture, preventing any graininess that might occur with other sugars. Secondly, it imparts a rich sweetness that is perfectly balanced, avoiding the overly sweet taste that can sometimes result from using powdered sugar.
The chilled sweetened condensed milk not only contributes to the creamy texture but also ensures that every spoonful of your homemade ice cream is smooth and delectable.
Quality matters immensely when it comes to the few ingredients in this simple ice cream recipe, and that includes the sweetened condensed milk. Opting for a high-quality brand will enhance the overall flavor profile of your ice cream.
When combined with the whipped heavy cream and pure vanilla extract, the sweetened condensed milk acts as the ideal sweetener and binder, creating a harmonious blend that sets the stage for any additional flavorings or mix-ins you might choose to add.
This ingredient is a game-changer in the world of no-churn ice cream, providing a foolproof way to achieve a luxurious dessert with minimal effort and maximum enjoyment.
Vanilla extract
The role of vanilla extract in our homemade ice cream cannot be overstated; it’s the subtle yet impactful ingredient that brings a warm, complex flavor to the creamy concoction.
For the most authentic and rich vanilla taste, it’s essential to use pure vanilla extract rather than imitation varieties. The quality of the vanilla extract will shine through in the final product, as it’s one of the three foundational ingredients in this recipe.
A tablespoon of this aromatic essence is all it takes to elevate your ice cream from plain to gourmet, infusing every bite with a classic flavor that serves as a perfect base for a myriad of delightful variations.
Incorporating pure vanilla extract into your ice cream mixture ensures that the simple elegance of vanilla permeates throughout, complementing any additional flavorings or mix-ins you may decide to introduce.
Whether you’re aiming for a timeless vanilla ice cream or using it as a versatile base for other creations, the inclusion of high-quality vanilla extract is a small but significant step that will make a noticeable difference in the taste and allure of your homemade dessert.
So, as you gather your ingredients, remember that the choice of vanilla extract is just as crucial as the cream and sweetened condensed milk in crafting a truly exquisite batch of homemade ice cream.
Flavorings (optional)
While the classic vanilla flavor is a timeless choice, the beauty of homemade ice cream is the endless variety of flavorings you can incorporate to tailor your dessert to your palate.
Optional flavorings can range from natural fruit purees to decadent chocolate swirls, or even aromatic spices like cinnamon or cardamom.
For those who love a minty freshness, a teaspoon of peppermint extract can transform your ice cream into a refreshing treat. If you’re feeling adventurous, almond extract or citrus zests can introduce a new dimension of flavor.
Remember, when adding flavorings, it’s all about personal preference and creativity, so feel free to experiment with different combinations to discover your perfect ice cream masterpiece.
For a delightful twist, consider mix-ins like chocolate chips, nuts, or cookie pieces to add texture and extra flavor to your ice cream. If you’re aiming for a specific flavor like Mint Chocolate Chip or Strawberry, adjust the quantity of your mix-ins accordingly to ensure a balanced taste.
It’s important to add these flavorings after you’ve blended the main ingredients to maintain the smooth consistency of your ice cream. Once you’ve achieved the desired flavor profile, gently fold in your chosen mix-ins or give them a quick pulse in the blender for an even distribution before freezing.
The possibilities are truly endless, allowing you to craft a custom ice cream experience right at home.
Steps to make ice cream with a blender

Chill the blender and ingredients
Before diving into the blending process, it’s crucial to chill your blender and ingredients. This step is often overlooked, but it’s key to achieving that perfect ice cream consistency.
Start by placing your blender jar in the freezer for about 15-30 minutes before use. Similarly, ensure that your heavy cream, sweetened condensed milk, and any other mix-ins are well-chilled.
This helps in whipping the cream to stiff peaks more effectively and prevents the ice cream mixture from melting too quickly during blending, which is essential for a smooth and creamy texture.
Chilling not only the blender but also the ingredients stabilizes the mixture, allowing it to freeze uniformly once transferred to the container.
If you’re using a custard base, as suggested by KitchenAid, remember to freeze it in ice cube trays beforehand. This ensures that when you blend the frozen custard cubes, they’ll combine seamlessly with the chilled liquid, resulting in a rich and indulgent homemade ice cream.
So, don’t skip this simple yet effective chilling step—it’s the foundation for a successful ice cream-making session.
Blend the heavy cream until stiff peaks form
Once your blender and ingredients are sufficiently chilled, it’s time to focus on the heavy cream, a crucial component for the structure of your ice cream. Pour the cold heavy cream into the blender and start blending on a medium to high setting.
You’re aiming for the cream to reach a state where stiff peaks form—a sign that the cream has been whipped to the perfect consistency. This process incorporates air into the cream, giving your ice cream its light and airy texture.
It’s important to monitor the cream closely during this step to avoid over-whipping, which can lead to a buttery texture.
When the heavy cream has achieved stiff peaks, you’ve laid the groundwork for a creamy and luscious ice cream base.
This is the moment where the transformation from liquid to a semi-solid delight begins. As highlighted by USA Today, using heavy cream is essential for this recipe, as lighter dairy options won’t hold the structure as well.
The stiff peaks are your cue that the base is ready for the next step: incorporating the sweetened condensed milk and vanilla extract, which will add sweetness and flavor to your homemade ice cream.
Add sweetened condensed milk and vanilla extract
With your heavy cream whipped to perfection, it’s time to gently fold in the chilled sweetened condensed milk. This ingredient is key for adding a smooth, sweet depth to your ice cream without the risk of a grainy texture.
Pour the sweetened condensed milk into the blender with the whipped cream, and blend on a low setting until just combined. It’s important to blend carefully to maintain the airiness of the whipped cream.
Next, incorporate the pure vanilla extract, which will infuse your ice cream with a rich, classic flavor. As recommended by USA Today, using pure vanilla extract is crucial for achieving the best taste, as it’s made from real vanilla beans without any artificial flavors.
Once the sweetened condensed milk and vanilla extract are fully integrated, you’ll notice the mixture taking on a silky, cohesive consistency.
This is the ideal base for any additional flavorings you might want to add. Whether you’re aiming for a simple vanilla ice cream or looking to experiment with various mix-ins, this step ensures that your base is sweet, flavorful, and ready for the final touches.
Remember, the quality of your ingredients can make a significant difference in the end result, so opt for high-quality sweetened condensed milk and vanilla extract to elevate your homemade ice cream to the next level.
Add flavorings and blend until combined
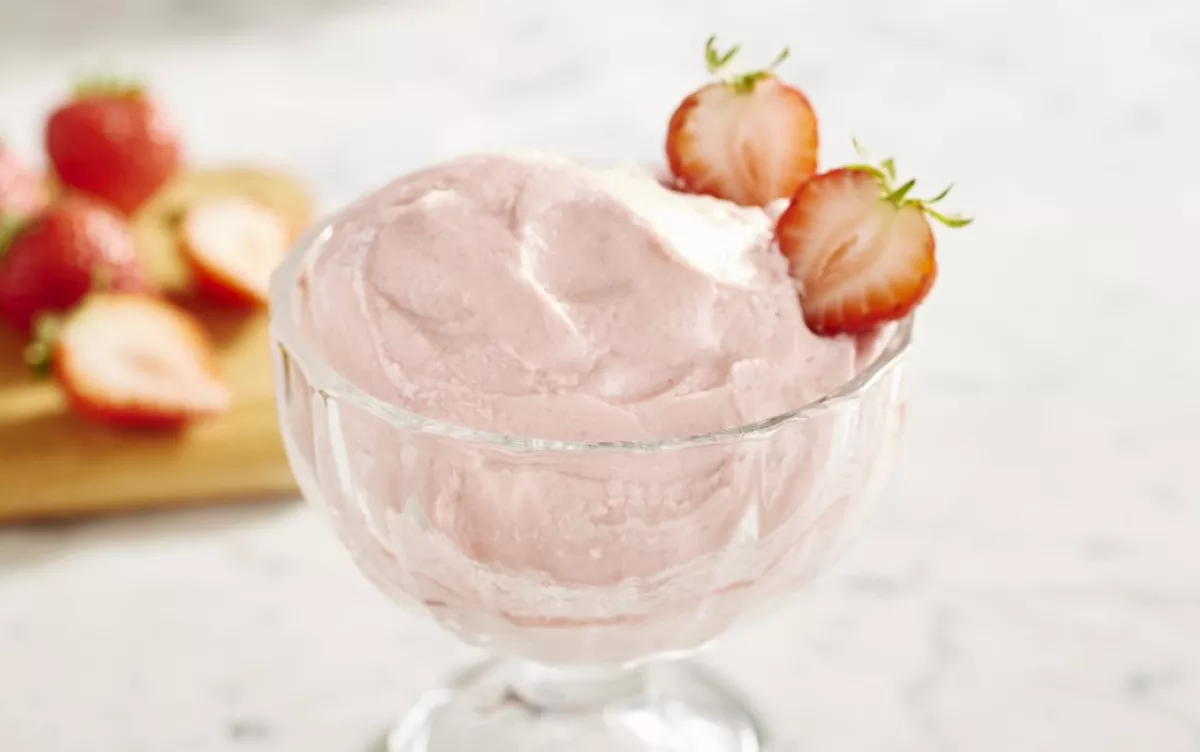
Now comes the exciting part where you can personalize your ice cream with your favorite flavorings. If you’re feeling adventurous, consider blending in cocoa powder for a chocolatey twist, or add fresh fruit like strawberries for a burst of natural sweetness.
For those who love a bit of texture, toss in some cookie crumbles or chocolate chips. Blend these additions on a low setting until they are evenly distributed throughout the ice cream mixture.
The goal is to achieve a uniform flavor while preserving the creamy texture you’ve worked so hard to create. As It Doesn’t Taste Like Chicken suggests, be mindful not to overmix, as this can lead to a less desirable consistency.
After thoroughly combining your chosen flavorings, you’ll have a customized ice cream base that’s ready for freezing. Whether you prefer a classic vanilla or a more elaborate concoction, the key is to blend until just combined, ensuring every spoonful is packed with flavor.
Remember, the versatility of your blender allows you to experiment with a wide range of ingredients, so don’t hesitate to try different combinations to find your perfect blend. With a little creativity and your trusty blender, the possibilities for delicious homemade ice cream are endless.
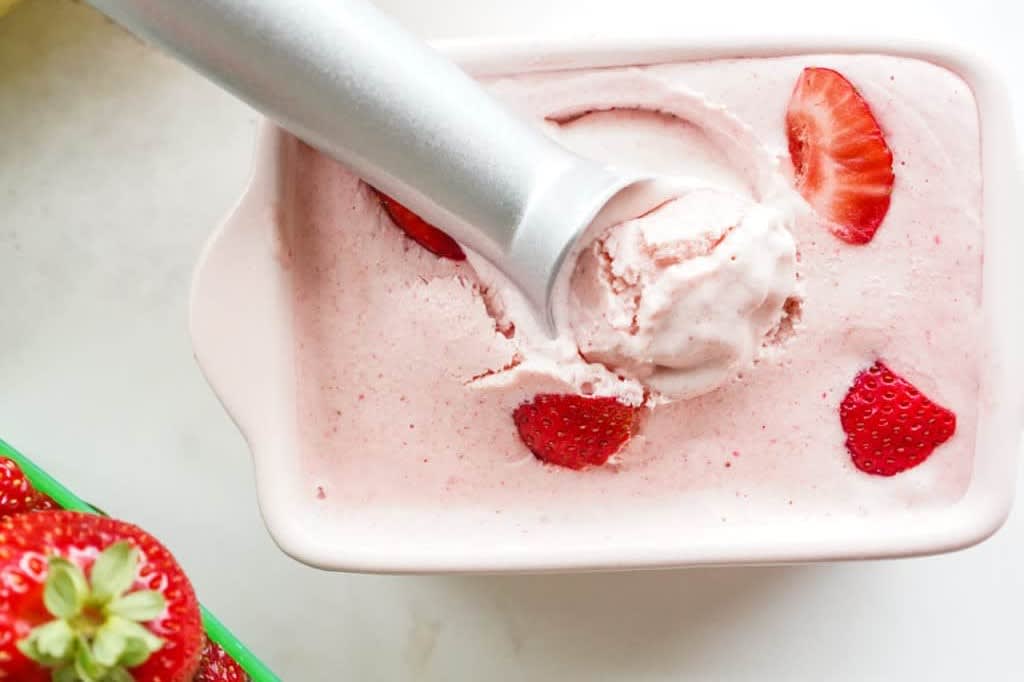
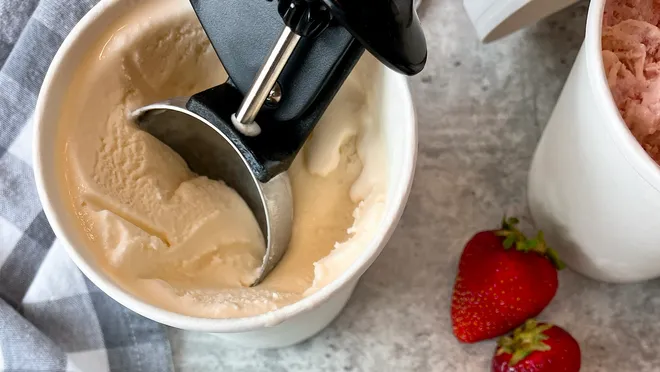
Transfer mixture to a container and freeze
Once your ice cream base is flavored to your liking, it’s time to prepare it for freezing. Pour the creamy mixture into a freezer-safe container, such as a glass or metal loaf dish, which can help speed up the freezing process.
To prevent ice crystals from forming and to maintain the smooth texture of your ice cream, cover the surface with plastic wrap, ensuring it touches the mixture.
This technique also helps to preserve the fresh taste and creamy consistency of your ice cream. Place the container in the freezer and allow the ice cream to solidify.
According to KitchenAid, freezing for about 4-6 hours should yield a firm yet scoopable consistency, perfect for serving.
If you desire a firmer texture, similar to store-bought ice cream, let the mixture freeze for a few additional hours. For those who enjoy mix-ins, this is the perfect time to stir in your favorite toppings like nuts, chocolate chips, or swirls of caramel or fruit jam.
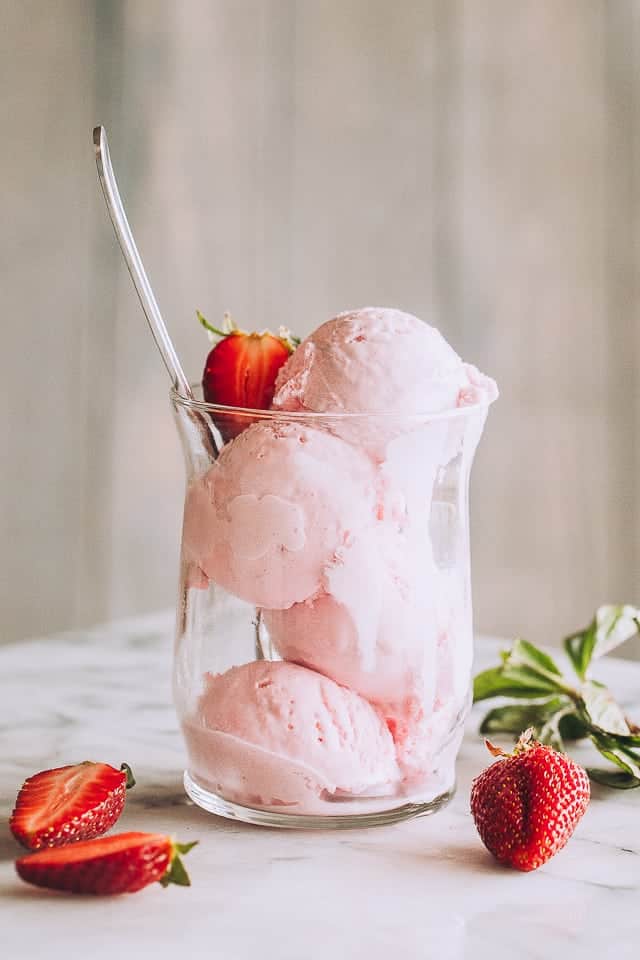
Once mixed, return the ice cream to the freezer to set completely. The result will be a custom, handcrafted dessert that’s sure to impress.
Whether you’re enjoying it in a cone or a bowl, homemade ice cream made with a blender is a delightful treat that showcases the simplicity and joy of making your own frozen delights.
Tips for making the perfect homemade ice cream
Experiment with different flavor combinations
Unlock the full potential of homemade ice cream by experimenting with a kaleidoscope of flavor combinations. Vanilla extract, while a classic choice, is just the beginning. Swap it out for almond extract or a dash of mint to lay the foundation for a new taste sensation.
For those with a penchant for creativity, the addition of candy, nuts, or even pretzels can transform your ice cream into a gourmet experience. As suggested by USA Today, the vanilla base pairs well with nearly any flavor, so feel free to mix and match to your heart’s content.
When it comes to packaging your frozen masterpiece, while pint-size containers offer a traditional charm, any airtight container will suffice to keep your ice cream fresh.
Remember, the quality of your ingredients can make a significant difference, so opt for high-quality mix-ins and flavorings to ensure the best results. Whether you’re crafting a single flavor or a medley of tastes, the joy of making ice cream with a blender lies in the endless possibilities and the personal touch you bring to each batch.
Use high-quality ingredients for best results
The secret to the most indulgent homemade ice cream lies in the quality of the ingredients used. High-quality heavy cream, for instance, provides a rich and luxurious texture that is the hallmark of premium ice cream.
Similarly, pure vanilla extract, as opposed to imitation vanilla, imparts a deep, aromatic flavor that elevates the overall taste experience.
When selecting sweetened condensed milk, opt for a brand with a reputation for consistency and flavor. These choices, while seemingly small, make a significant impact on the final product, ensuring that each spoonful of your homemade ice cream is as delightful as the last.
Moreover, when incorporating additional flavorings or mix-ins, the same principle applies. Premium cocoa powder, fresh fruits, or artisanal mix-ins like handcrafted caramel or chocolate will not only enhance the flavor but also add a touch of sophistication to your dessert.
As you embark on your ice cream-making journey, remember that the caliber of your ingredients reflects directly in the taste and texture of your ice cream, making it worth the investment.
By using the finest ingredients, you’re not just making ice cream; you’re crafting an extraordinary culinary experience right from your blender.
Allow the ice cream to soften slightly before serving
For the perfect scoop, patience is key. Allowing your homemade ice cream to soften slightly before serving can greatly enhance its texture and flavor.
After removing it from the freezer, give it a few minutes at room temperature to ensure it reaches a creamy consistency that’s easy to scoop and melts delectably on the tongue.
This small step can make a world of difference, turning a good ice cream experience into a great one. It’s a simple yet effective technique recommended by ice cream aficionados and experts alike, ensuring that each serving is just as enjoyable as it is intended to be.
Keep in mind that the softening time may vary depending on the ingredients and mix-ins used. Dense add-ins like chocolate chips or nuts may require a bit more time to reach the ideal serving texture.
By allowing your ice cream to soften, you’re also ensuring that the flavors meld together beautifully, providing a harmonious balance with every bite.
So, resist the temptation to dive in immediately and give your homemade creation the time it deserves to shine.
Conclusion
In conclusion, mastering the art of making ice cream with a blender is an enjoyable and rewarding process that yields delicious results.
By starting with chilled, high-quality ingredients and following the simple steps outlined, you can create a delectable treat that rivals even the finest store-bought varieties. Remember to allow your ice cream to soften slightly before serving, as this will enhance its creamy texture and rich flavors.
Whether you’re experimenting with classic vanilla or venturing into more adventurous flavor territories, the satisfaction of indulging in your own homemade ice cream is unmatched. So, gather your ingredients, power up your blender, and get ready to enjoy the fruits of your labor—one creamy, dreamy scoop at a time.
Embrace the creativity and simplicity of this blender ice cream method, and don’t hesitate to share your culinary successes with friends and family.
As you refine your technique and explore new flavor combinations, you’ll find that the possibilities are endless. With each batch, you’ll not only impress your taste buds but also gain the confidence to tackle even more homemade dessert projects.
So, scoop up your spoons and savor the sweet satisfaction of homemade ice cream, perfected by your own hands and a trusty blender.
Sources:
- https://www.usatoday.com/story/life/food-dining/2022/07/21/best-ice-cream-recipe-without-machine/10123152002/
- https://www.kitchenaid.com/pinch-of-help/countertop-appliances/how-to-make-ice-cream-in-a-blender.html
- https://www.justapinch.com/recipes/dessert/ice-cream/blender-ice-cream.html
- https://www.sidechef.com/recipes/1424/home_made_ice_cream_in_a_blender/
- https://itdoesnttastelikechicken.com/how-to-make-ice-cream-in-a-blender/
FAQ
-
Does blending ice cream make it soft serve?
Blending the ice cream with the heavy cream will produce a softer, runnier mixture, which can be transferred to a Ziploc bag and left to set in the freezer.
-
Can you make ice cream in a mixer?
If you are using the Ice Cream Maker attachment on your KitchenAid® stand mixer, remember to turn the mixer to stir first and then add your ice cream to the bowl. This will help ensure that the mixture doesn’t start freezing in the bowl before it is churned.
-
How to make homemade ice cream without a machine?
HOW TO MAKE NO-CHURN ICE CREAM: WHIPPED CREAM METHOD
1: Freeze a Metal Loaf Pan.
2: Mix the Flavoring Ingredients.
3: Whip the Heavy Cream.
4: Fold Together the Cream and Flavorings.
5: Freeze the Ice Cream.
6: Add Mix-Ins.
7: Freeze Again.
8: Make the Mix.


